Ever looked at your car’s tinted windows and thought, “It’s time for a change”? You’re not alone. Removing window tint can blow new life into your ride, but it’s not as simple as peeling off a sticker. This guide will walk you through the ins and outs of tint removal, ensuring you don’t end up with a scratched-up mess. We’ll cover everything from safety protections to various removal techniques, so you can tackle this project with confidence.
Before we dive in let’s set the stage. Window tint removal isn’t rocket science, but it does require patience and the right approach. Whether you’re dealing with an old bubbling tint or just want a fresh look, understanding the process is key. We’ll explore different methods from heat guns to soapy solutions, and help you choose the best one for your situation. Ready to uncover the secrets of streak-free windows? Let’s get started!
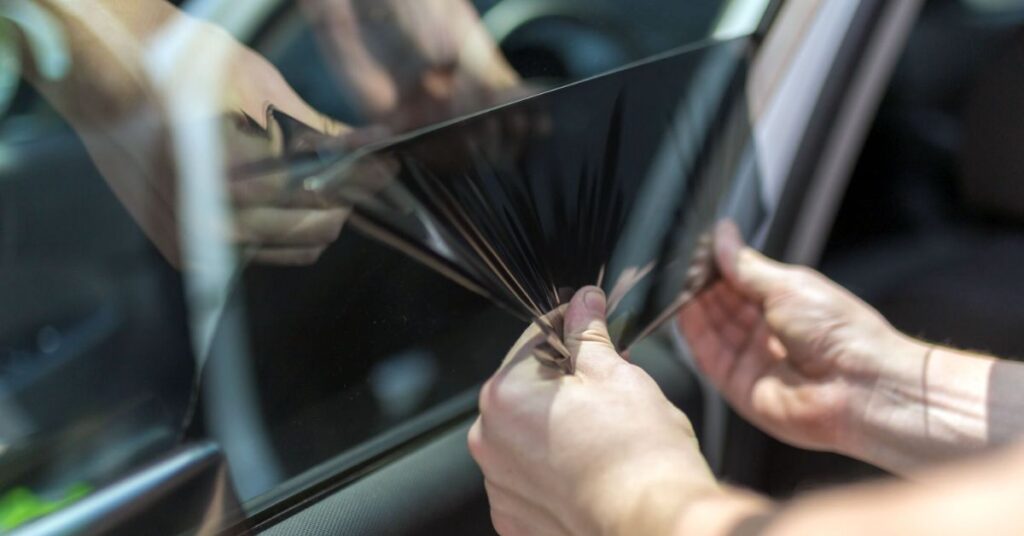
Window Tint Removal
Tired of your old window tint? It’s time for a change. Removing window tint can be tricky, but don’t worry. We’ve got you covered
1. Roll Window Down
It’s important to roll down the window slightly. You’ll be able to reach all the nooks and crannies of the tint.It’s easier to work on a flat surface.
Be gentle as you roll it down. The old tint might be brittle and could start peeling right away.
Don’t forget about the top edge. Rolling the window down lets you see where the tint begins.
This step helps you plan your attack. you can ensure that you can easily remove a simple yet effective step in the overall window tint removal process.
2. Grab Your Steamer
It’ll help loosen the adhesive color without damaging your window. No steamer? No problem! You can rent one. Before you start check the steamer
Steam is hot, so keep those fingers out of the way. Use gloves if you’ve got ’em. This heat makes the tint more pliable and easier to remove
As the steam interacts with the adhesive, it helps to loosen it, making it easier to lift and peel off the tint. It’s a great option for those looking to remove window tint without damaging their windows or spending too much time on the task.
3. Start Peeling (Be Careful)
Begin at a corner. Use a razor blade or plastic scraper to gently lift an edge of the tint. Don’t rush Once you’ve got a good grip, start pushing. Aim for a 45-degree angle as you peel. This helps prevent the tint from tearing.
The heat and vapor will make your job easier. If you feel conflict, stop and apply more steam. Expect some stubborn spots. The old tint might come off in pieces. Don’t worry, be careful. Work in sections. Don’t try to peel the entire window at once. Focus on small areas for better control.
If the tint starts to tear, don’t panic. Just find another edge and start again. Watch out for adhesive residue. It’ll likely stick around after the tint’s gone. Keep your workplace clean. Have a basket handy to dispose of the peeled tint as you go.
Peeling tint can be tedious. It’s okay to step back and rest your hands occasionally. Remember, the goal is to remove the tint without scratching your window. If something doesn’t feel right, stop and reassess. Once you’ve peeled all the visible tint you are the best.
4. Slowly Start Pulling
You’ve loosened that tint, now let’s get it off.
Grab a corner and carefully and gradually pull it off.
Easy does it –. No need to rush!
Make sure to do this slowly and evenly to avoid any potential tearing or damage to the window or defroster
You can get a clean removal and avoid any unwelcome mishaps by carefully and patiently pulling the window tint away from the window. When removing the tint, remember to pay attention to the window and defroster.
5. Remove Glue Residue
Grab your spray bottle and mix up some soapy water, getting it nice and wet. Grab a cloth or sponge and start scrubbing. For those stubborn spots, try using a plastic scraper, but remember to be gentle. This step is important to ensure that the window is clean and free from any sticky residue.
Alternate Window Tint Removal Methods
There are a few ways to remove window tint. You can use heat, like a hairdryer, to peel it off. Or, try a soapy solution to soften the adhesive. Each method has its own perks, so pick what feels right for you.
Heat Gun / Hair Dryer
Using a heat gun or hair dryer is a great way to loosen adhesive. Just warm up the area gently. Be patient, and don’t hold the heat too close. As the tint softens, it will peel off more easily
Ammonia Solution
An ammonia solution can help break down sticky adhesive. Just spray it on the window tint and let it sit for a bit. The tint will start to loosen, making it easier to remove. Make sure to work in a well-ventilated area, and you’re good to go
Razor Blade
A razor blade can be handy for removing stubborn bits of tint. Hold it at a slight angle and gently scrape away the residue. Be careful not to scratch the glass. Take your time, and it’ll come off smoothly!
Professional Window Tint Removal
If you want a hassle-free experience, go for professional window tint removal. Experts have the right tools and know-how to get the job done quickly. It’s a great choice if you prefer a clean, easy process without any fuss
Cleaning the Window
After removing the tint, it’s time to clean the window. Use a glass cleaner or a mix of vinegar and water. Wipe it down with a clean cloth. This will help remove any leftover adhesive and make your window sparkle!
Importance of cleaning the window after removal
Cleaning the window after removal is important. It gets rid of any leftover glue or dirt. A clean window looks better and lets in more light. Plus, it helps you see clearly through your glass.
Recommended cleaning products
For cleaning, use a good glass cleaner or a mix of vinegar and water. These options work well and are easy to find. Avoid harsh chemicals that could damage your glass. Stick to gentle, effective products for the best results.
How to avoid scratches
To avoid scratches, be gentle when cleaning. Use a soft cloth or sponge. Don’t use abrasive materials or scrub too hard. Take your time and handle the glass with care. This way, your window stays smooth and scratch-free.
Frequently Asked Question
What tint is legal in Ohio?
In Ohio, the legal limit for window tinting is 50% VLT (Visible Light Transmission) for the front side windows and 35% VLT for the rear side and back windows. The windshield can have a tint strip at the top, but it must be no more than 5 inches in height and not below the AS-1 line.
How much tint is legal in NY?
In New York, the legal limit for window tinting is 70% VLT for the front side windows. The rear side and back windows can be tinted as dark as you prefer. The windshield can have a tint strip at the top, but it must be above the AS-1 line.
How much does it cost to tint a car all around?
The cost to tint a car all around can vary depending on the type of tint and the size of the vehicle. On average, you might expect to pay between $200 and $600. High-quality films or luxury vehicles may cost more.
Conclusion
removing window tint can be a straightforward process with the right methods. Whether you use heat, an ammonia solution, or a razor blade, just take your time and follow the steps carefully. Each method has its benefits, so choose what works best for you.
Once the tint is removed, don’t forget to clean the window thoroughly. This step ensures there’s no leftover adhesive and keeps your glass looking great. With a bit of patience and the right tools, your windows will be sparkling clean in no time!